Thursday 21 April 2016

BA1B-task 5


For my final task of the 1st year, we were told to create a time machine which could be based on anything as long as we could justify it. The first thing that came into my mind when thinking about time machines was Victorian mechanical devices such as Tesla coils or Zeppelins. This led me to coming up with the idea of making a hot air balloon but I still though the mode of transport on its own was to vague so I imagined that There would be some sort of cannon or very high powered gun attached to the basket which open time tears in the fabric of the sky so that the balloon can float through them. At first I designed the model with too many faces due to the small complicated parts and that the cog by the sides of the time machine had too many faces. Another common problem that I faced was getting the geometry right on the balloon itself because if I extruded it wrong, the face would inverse themselves in the wrong places. When I tried using Zbrush to Decimate the balloon, it got rid of too much geometry so I decided to go an alternative route by using Quixel to apply detail to the map instead. Quixel works as an add-on to Photoshop where it has 3 main functions. Like my pillar, I had to make a high poly map and a cage (keeping my simplified model as a low poly)  and then bake an ambient occlusion map and a normal map in the XNormal.


However for Quixel, I additionally a diffused map by using the quixel colours to group parts of my model in various colours to symbolize different materials. After that I created a diffused Map on Maya which will later help create the Albedo map for the model. The first stage of Quixel was using NDO to add/incorporate textures into the normal map. I did this by using photographs of the materials I wanted from http://www.textures.com/ which I had a free license for meaning I could 12 textures per day. The most prominent ones that I remember was the metal bulkhead effects which alternatively worked as a woven basket texture and a rough canvas texture to resemble the patchy hot air balloon. the 2nd part of quixel is using DDO to apply pre-loaded colour textures to your model by selecting parts that I defined by your defused map. You can see your progress in the 3rd feature 3DO, where all the maps are loaded onto your low poly model to display a finished rendered result. Conveniently, quixel also has a turntable setting which I ended up using instead of Marmosets because Not all the colour maps loaded onto marmoset. I did make a backup turntable and copy on Marmoset.


BA1B task 4 (part 2)

After I was satisfied with the amount of damage I had applied to the pillar, I saved the current state the pillar was in (high_poly model) so that I could decimate the pillar down so that it has less than 10 thousand faces and retains similar geometry (low_poly model). After I had completed those stages. I imported my low and high poly models back onto Maya on separate layers, however I had to additionally create a cage for my model to bake in ( the cage is a transparent copy of the low poly model that covers both the low and high poly models but has to have the same topology)This also involved unwrapping the low poly model by planar mapping each of the UV shells and unfolding them to take sure that they are flat. . The next stage of the process was to import all 3 models from maya into Xnormal so that I can create a Normal, ambient occlusion and a roughness map for my pillar.


The last stage of the process was to import the Pillar into the Unreal 4 Engine, so I can show how it would look like in a game scenario. After importing the low poly model in, I had to attach all the maps to it so it can look detailed in the game engine.


BA1B task 4


For this task assigned the task of creating a pillar- as simple or complex as we wanted it and then UV map it and bake a normal and an ambient occlusion map. Since I was was into the series 'Vikings' at the time, I decided to base my pillar on a ancient Nordic monument known as an Irminsul. I kept my Pillar design fairly simple so that I could spend more time focusing on the damaged detail and the worn out rock textures. To do this, I imported the pillar into Zbrush and started making organic detail using the dynamic trim brush, changing the stroke from freehand to scattered dots to get various roughness effects. I referenced my damage to existing warn out rocks to get a more realistic texture. After that I finished it off by applying some scratches and added 'Noise' to model so that the particles ad further damage to the pillar.


BA1B task 3

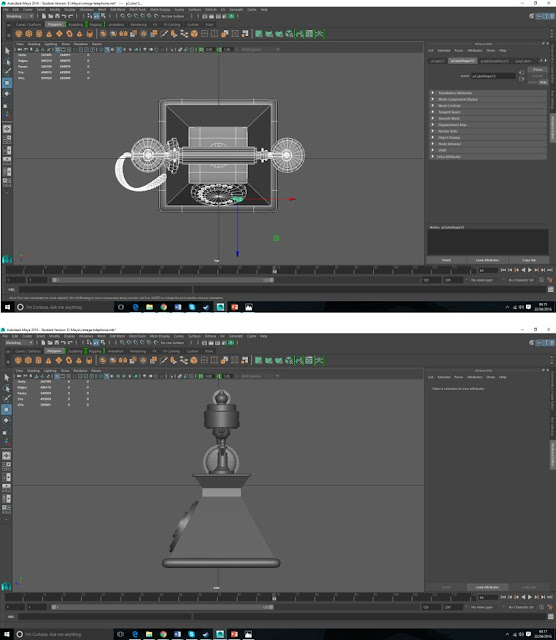
For our 3rd task, our objective to use our Maya skills to recreate the object pictured on an assigned photograph. The one we received was that of a vintage telephone which required various modeling techniques to incorporate into our model. Even though this task was relatively hard, it was a guseful learning process because I manged to learn how to extrude shapes and faces as well as softening edges. If I return to this task in the future, I want to improve the telephone wire and holder of the voice receiver in the telephone because even though I temporarily left them as they are, they are not quite right and don't 100 %  match the model. I also learnt how make a duplicate special (circular duplicate) and how to engrave into the surfaces.


BA1B task 2

Our next task after creating basic shapes was to  focus on UV mapping and basic colouring. To speed the process up, our lecturer had already pre-made the shape so we learnt how unwrap it into a flat base then bake it to generate a normal map. After that we took it into Photoshop, where we learnt how to apply basic colour to various sections. I decided to give my barrel a retro/cartoon like theme. we then imported the map back onto M
aya and applied it to the existing 3D model. If I had more time I on this project, I would definitely revisit it and make the barrels appearance look more realistic.

BA1B task 1


For the start of our 2nd project at University, we  began to study and learn to use 3D programs. Even though I have briefly used 3D software before when we looked at Zbrush, the techniques that I learned using Autodesk Maya became fairly clear to me since we started off doing simple stuff, which got progressively harder.
During our first Maya workshop, our task was to create a table lamp using basic shapes. After that I decided to develop the lamp further by curving neck and adding colour and shading to make it look more visually appealing.

Friday 13 November 2015

Final Concept


The final concept scene is based on the Soldier's march, just before he will meet the Witch. I was originally going to do a battlefield but I then turned more to the woodland idea to make the scene feel more like an enchanted fairy tale where most adventures happen in the deep dark woods. I did however keep the idea that we has been fighting previously due to the dead bodies scattered around the Forrest. I based my background one the image above of an ambient Forrest but developed my image a lot more so it looks like the solider is walking in the evening than the morning.